Google Endoplaza

Removing broken instruments


Indispensable instruments/appliances:

Removing broken files on various levels in the canal:
  1. a file almost putting out in the pulp chamber
  2. a file broken halfway in the root canal
  3. a file broken off close to the apex
  4. removing a short piece (2-3 mm) of NITI file (like Profile)
ad a. A file almost coming sticking out in the pulp chamber.
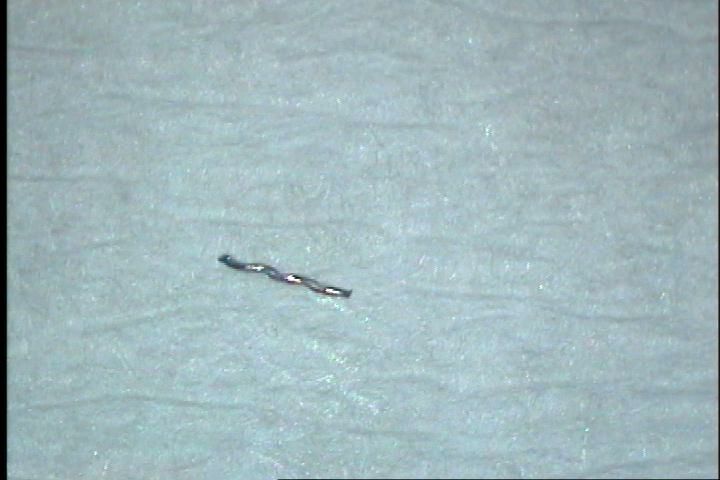
Make the file well visible by removing possible overhanging dentine. Try to drill the file loose with an ultrasonic tip. Should this not work, then try to create some space with ultrasonic tips plus minus 3 mm towards apical along the file. Try to clench the file in the IRS instrument.

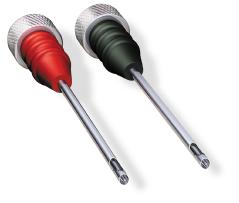
Carefully pull the file out of the canal.
.

In this movie you see how a broken file is removed with the IRS system. (Left for wide band, file: approx 2 Mb) (Right for ISDN, file: approx. 0,3 Mb)

.

ad b. A file broken off halfway the root canal.
The canal part over the file is prepared with a Gates Glidden drill
being filed off until its broadest point. A round LN drill with a diameter of 0,8 millimetre can be used well for this purpose. With the operating microscope, the top of the broken file can be seen well. Now, with special ultrasonic tips another few millimetres of the file are prepared free a bit. The ultrasonic vibration helps in loosening the file. Should the file still stuck, then with the IRS-system can be tried to clip the file and pull it out. If this still does not work, then prepare again some millimetres further along the file. NiTi files
have almost to be prepared separately until the end as there is always some tension in the canal. During the treatment there is a risk that a small part of the file vibrates off. With the operating microscope one can see very sharply if a part of the file has remained behind. If so, the procedure is followed again.

Tips:
  • Sometimes, a loose steel file can be pulled more easily by temporarily making a magnetic.
  • A completely loose NiTi part can be removed with a little bit of Vaseline to a hand plugger. By the way, this is also possible with a small amount of glue.
  • During loosening, solvents like Glyde or RC Prep in combination with hypochlorite are used in order to stimulate the file’s loosening.
  • Take care that a loose part of the file does not accidentally fall in another canal during free preparing. Just seal the other canals with a small tip of Cavit.

ad c. A file broken off close to the apex.

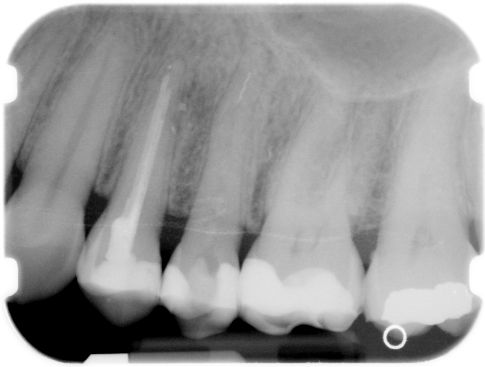
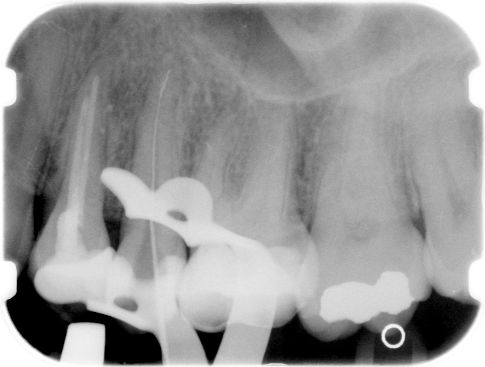
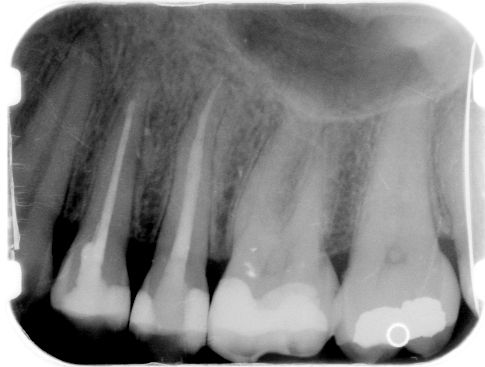
Until recently one had to consider if, with a broken file in the apical territory, removing did not cause more damage than maintaining. Certainly in curved canals it was almost impossible to remove both the broken file and to spare the radix. Passing and removing the part of the file is the best solution, which is shown in the movie. (Attention: the size of the file is 13 Mb.)

ad d. When a piece of Profile is broken off halfway or deep in the canal, then, an attempt can be made to remove that piece as follows:
  • Measure the exact length of the broken piece of the file on the basis of the remaining part of the Profile.
  • Put Glyde in the canal in question.
  • For the time being, do not make space over the broken piece.
  • Try to come into the winding of the Profile with 06 files (have about 10 copies at hand). During tugging back, quite soon resistance is felt.
  • Try to come further by constantly turning to the right. A 06 file has almost immediately became a small threat.
  • Once the small piece of file has gone through, follow the same procedure with a 08 file etc. etc.
  • If the piece of the file is lying loose, it can be removed with the help of a small amount of Vaseline on a hand file.
Pay attention to the use of Hedström files to get the broken pieces out! If a piece of that file breaks off, it is almost impossible to remove it.

Click on the camera to see a short movie of the procedure. (Please note that the size of the file is 13Mb.)


Removing a broken lentulo needle

If a lentulo needle breaks, then it often happens at the height of the canal entrance. If the needle is really stuck, then, it would be advisable to loosen the lentulo needle with a vibrating ultrasonic file. Then, a hand file or Rotary file is placed in the winding and the file is turned loose in a clockwise direction. (Contrary to the usual files which turn debris etc. out of the canal, a lentulo needle is turning paste to the right in the canal. So, in order to remove the needle, one should turn the needle clockwise!).
Of course, also within seconds glue hand file can be pasted to the lentulo needle and then be pulled out of the canal while turning it clockwise.

Tip:
Take a comparable lentulo needle and try to find a type of file which after 2 to 3 windings jams in the lentulo needle. This can simply be done by drawing the file at the end of the lentulo needle in the windings. Now it is more certain that the file fits in the broken lentulo needle.


From this page you can order in our web shop


  • Operating microscope
  • Hand plugger
  • Hand files
  • Rotary files
  • Gates Glidden Drills 1, 2 and 3 (the bigger canals possibly with 4 or 5)
  • Glyde Intro Package
  • Ultrasonic apparatus
  • Ultrasonic tips
  • IRS instrument
  • LN drills (thin round drills with a long shaft)
to last chapter: Removing old canal fillings
to next chapter: Detecting perforations/fausse (false) routes

©2005 Endoplaza.com  |  This page is best viewed in a resolution of at least 1024 x 768 pixels  |  Latest update on 21 November 2006